小程序自定义tabbar导航栏、动态控制tabbar功能实现(uniapp) |
您所在的位置:网站首页 › uniapp 自定义tabbar 凸起 › 小程序自定义tabbar导航栏、动态控制tabbar功能实现(uniapp) |
小程序自定义tabbar导航栏、动态控制tabbar功能实现(uniapp)
|
uniapp开发小程序,不同角色/已登录未登录,都有不一样的底部导航栏,这些情况下就需要自行定义tabbar,从而实现动态tabbar的实现。
1.首先我们需要在pages.json配置tabbar 我这里并没有开启custom(自定义),不开启的话,他在页面是有占位的,那就需要在页面进行隐藏,后面会讲到; 这里是直接给一个路径就可以,用于后期使用uni.switchTab(OBJECT)进行跳转 "tabBar": { // "custom": true, "list": [{ "pagePath": "pages/home/index" }, { "pagePath": "pages/personal/index" }, { "pagePath": "pages/personal/notMemberIndex" } ] }2.我们需要配置tabbar列表,根据角色的不同设置不同的tabbar列表数据 我是登录的用户跟未登录的用户是不同的tabbar的一个显示;重点: !! 这里的text,pagePath,iconPath, selectedIconPath,这四个命名必须跟pages.json里面tabBar配置的原始命名一致,否则会出问题!!
3.使用vuex对tabBar列表数据进行一个存储赋值
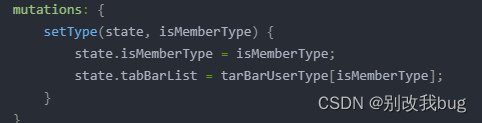
tabBar.js 对数据进行一个存储,赋值 import tarBarUserType from '@/utils/tabBar.js'; const tabBar = { state: { // 判断是否已登录(member/notMember) isMemberType: '', // tabbar列表数据 tabBarList: [] }, mutations: { setType(state, isMemberType) { state.isMemberType = isMemberType; state.tabBarList = tarBarUserType[isMemberType]; } } } export default tabBar;getters.js 获取存储在vuex的内容 const getters = { tabBarList: state => state.tabBar.tabBarList, isMemberType: state => state.tabBar.isMemberType, } export default getters4.需要自行封装一个tabbar组件 附上我自己简单封装的一个组件 {{ item.text }} export default { props: { // 底部导航栏数据 tabBarList: { type: Array, required: true }, // 当前页面路径 routePath: { type: String, required: true } }, data() { return {}; }, methods: { selectTabBar(path) { this.$emit('onTabBar', path) } } }; .tab-bar { position: fixed; bottom: 0; left: 0; width: 100vw; padding: 20rpx; padding-bottom: calc(10rpx + constant(safe-area-inset-bottom)); padding-bottom: calc(10rpx + env(safe-area-inset-bottom)); background-color: #fff; .content { display: flex; .one-tab { display: flex; flex-direction: column; align-items: center; width: 50%; .tab-img { width: 50rpx; height: 50rpx; .img { width: 100%; height: 100%; } } .tit { font-size: $font-size-base; transform: scale(0.7); } } } }5.在存在tabbar的页面中都需要引入组件,并传相关数据 6.在这些页面需要用到getters.js获取拿到这些数据 在存在tabbar页面的都需要使用计算属性获取tabbar数据!! import { mapGetters } from 'vuex'; computed: { // 这里的tabBarList就是数据源,直接使用传值 ...mapGetters(['tabBarList']) },7.判断是否登录 我这里是有个登录页面的,在登录页面的时候进行一个分配tabbar列表配置的一个操作(具体看个人业务逻辑) // 存储用户信息 setUserWxInfo(userInfo); // 调用上文vuex,member就是已登录的标识 that.$store.commit('setType', 'member');
在APP.vue, 以及所用到tabbar的页面,在onShow中调用 uni.hideTabBar({}); 对原始tabbar进行一个隐藏 9.在APP.vue中 对用户状态进行判断 在APP.vue中onShow里进行用户判断,如果已登录就传入member,否则传入notMember onShow() { uni.hideTabBar({}); if (getUserWxInfo('user_info')) { this.$store.commit('setType', 'member'); } else { this.$store.commit('setType', 'notMember'); } } 完结~大致就可以完成动态自定义tabbar这项需求了! |


 8.隐藏tabBar
【本文地址】
今日新闻 |
推荐新闻 |